Full-stack development involves working with both the front-end and back-end components of an application, including the user interface, logic, and data storage. IntelliJ IDEA Ultimate is an Integrated Development Environment (IDE) that provides a powerful and versatile toolset for developers to work with different programming languages and frameworks. In this article, we will guide you through setting up a full-stack development environment using IntelliJ Ultimate.
Prerequisites
To start, download and install IntelliJ Ultimate from the official website. You can choose between the community edition and the ultimate edition, but for full-stack development, we recommend using the ultimate edition as it provides more features and support for multiple programming languages.
We will need the following tools:
- IntelliJ for editing code
- Docker for running our code
- CoScreen for collaboration
Install docker
Docker Desktop is a tool that allows developers to easily create and manage containers, which are lightweight, portable, and self-contained environments that can be used to run applications. If you're new to Docker, installing Docker Desktop on your machine is the first step towards getting started with containerization. In this article, we'll explain how to install Docker Desktop on a Windows or Mac computer.
Installing Docker Desktop on Windows
- Visit the Docker Desktop for Windows download page on the official Docker website.
- Click the "Download from Docker Hub" button to start the download.
- Once the download is complete, run the installer file and follow the prompts to install Docker Desktop.
- During the installation process, you may be prompted to enable Hyper-V and/or the Windows Subsystem for Linux (WSL). Follow the prompts to enable these features if necessary.
- After the installation is complete, Docker Desktop should launch automatically. You can verify that it's running by opening a command prompt and running the command "docker version". This should display information about the Docker version and the client/server architecture.
Installing Docker Desktop on Mac
- Visit the Docker Desktop for Mac download page on the official Docker website.
- Click the "Download from Docker Hub" button to start the download.
- Once the download is complete, open the .dmg file and drag the Docker icon to the Applications folder.
- Open Docker from the Applications folder.
- During the first launch, you may be prompted to enter your system password to allow Docker to install additional components. Enter your password and follow the prompts to complete the installation.
- After the installation is complete, Docker Desktop should launch automatically. You can verify that it's running by opening a terminal window and running the command "docker version". This should display information about the Docker version and the client/server architecture.
Once you have Docker Desktop installed, you can start using Docker to create and manage containers. The Docker Desktop interface provides an easy-to-use GUI for managing containers, images, networks, and volumes. You can also use the command-line interface to interact with Docker directly.
You will learn more about docker and how it will be used in your new career throughout the next steps!
Code formatting + linting
Code formatting and linting are two important concepts for newbie developers to understand. While they may sound similar, they refer to different processes that can help developers write better code and avoid errors.
Code formatting refers to the process of organizing and styling your code in a consistent and readable way. This includes things like indenting code blocks, using consistent spacing and line breaks, and following naming conventions for variables and functions. Consistent code formatting can make your code easier to read and understand, which can be especially helpful when working on large or complex projects. Some popular tools for code formatting include Prettier, Black, and ESLint.
Linting, on the other hand, is the process of analyzing your code for potential errors, bugs, or style issues. Linters are tools that can automatically check your code for issues and provide feedback on how to improve it. This can include things like identifying unused variables, pointing out syntax errors, and highlighting potential bugs. Linting can help you catch errors early in the development process and avoid common mistakes that can cause issues down the line. Some popular linters for different programming languages include ESLint for JavaScript, and Pylint for Python.
In summary, code formatting and linting are two important tools for newbie developers to help them write better, more consistent code. Code formatting helps make your code easier to read and understand, while linting can help you catch errors early and avoid common mistakes. By using these tools in your development process, you can improve the quality of your code and become a more efficient and effective developer.
Let's setup our environment to support formatting and linting..
Install
npm install --dev @mateothegreat/eslint-configConfigure
Add the following lines to your package.json file at the bottom:
	"eslintConfig": {
        "extends": [
            "@mateothegreat/eslint-config"
        ]
    },
    "prettier": {
        "tabWidth": 4,
        "printWidth": 100,
        "bracketSameLine": true,
        "singleQuote": true,
        "arrowParens": "avoid",
        "semi": true,
        "trailingComma": "none",
        "bracketSpacing": true
    }
Tell IntelliJ to enable Prettier:
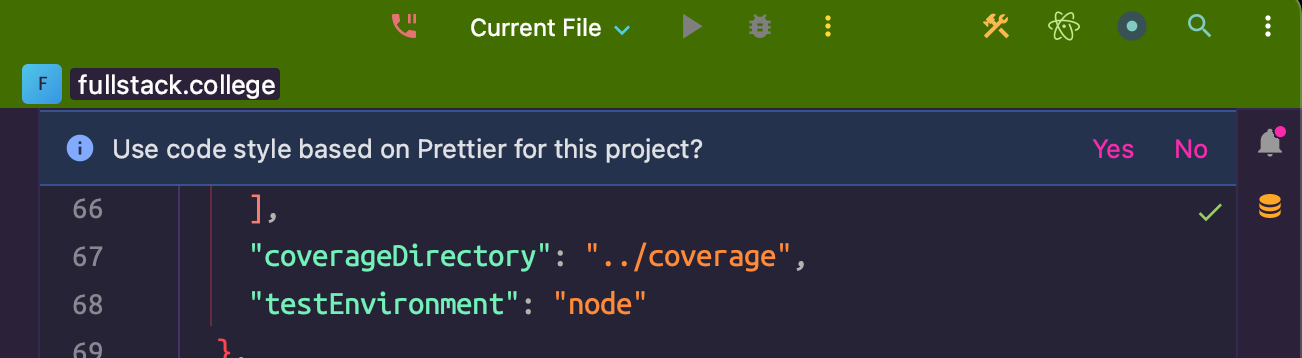
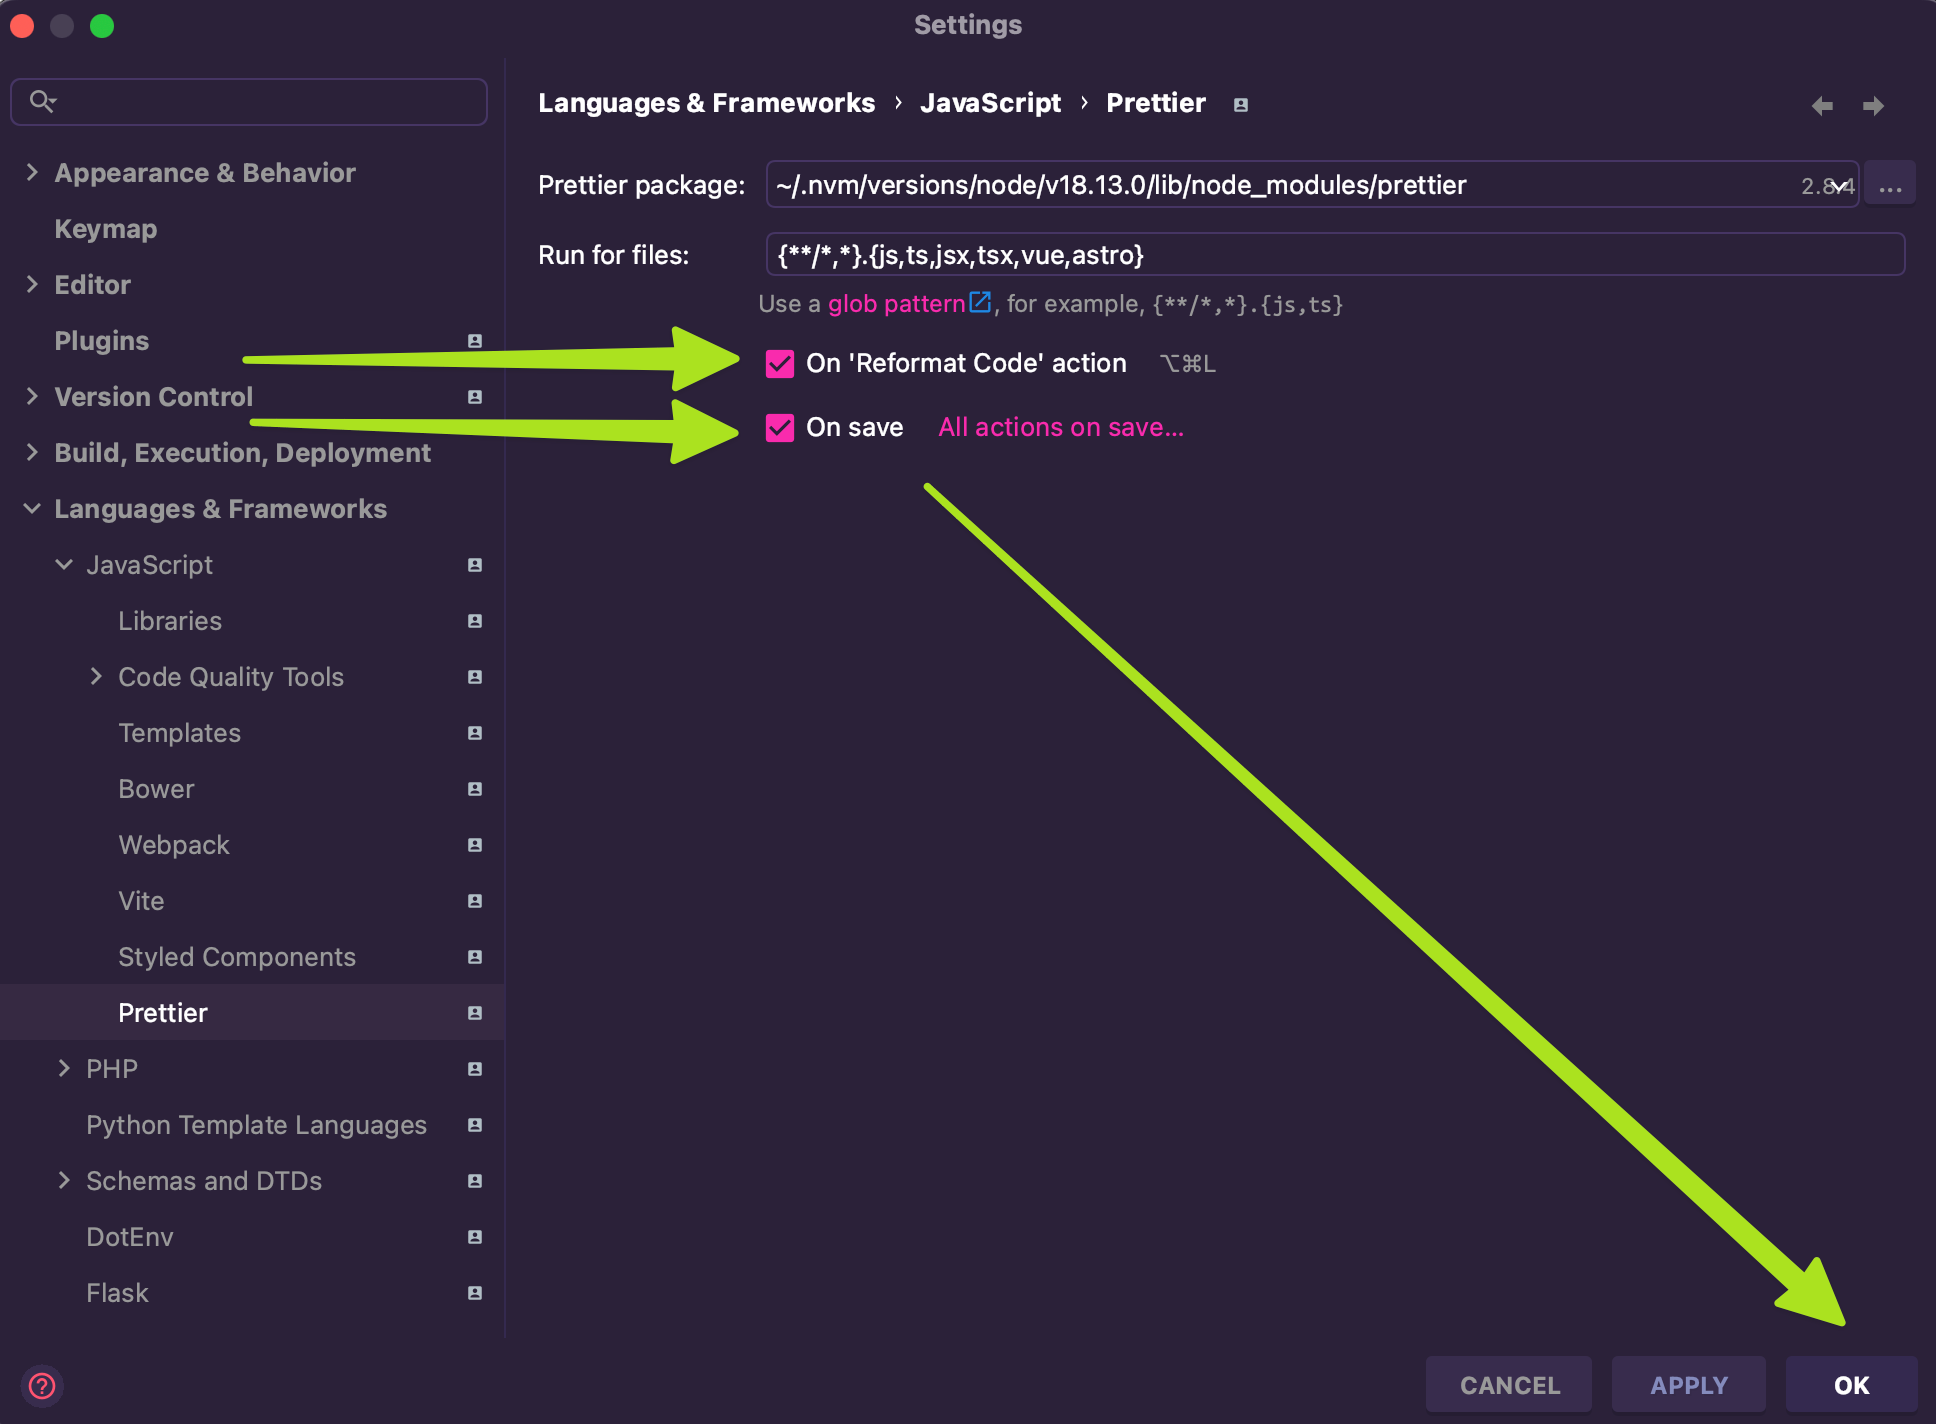
If that doesn't work you can go to your settings and apply the following:
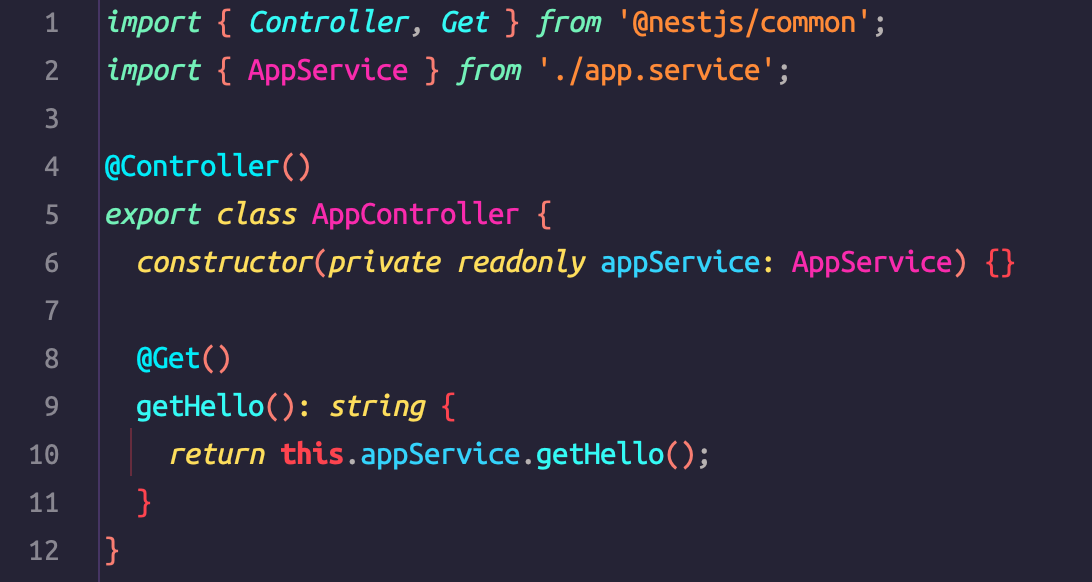
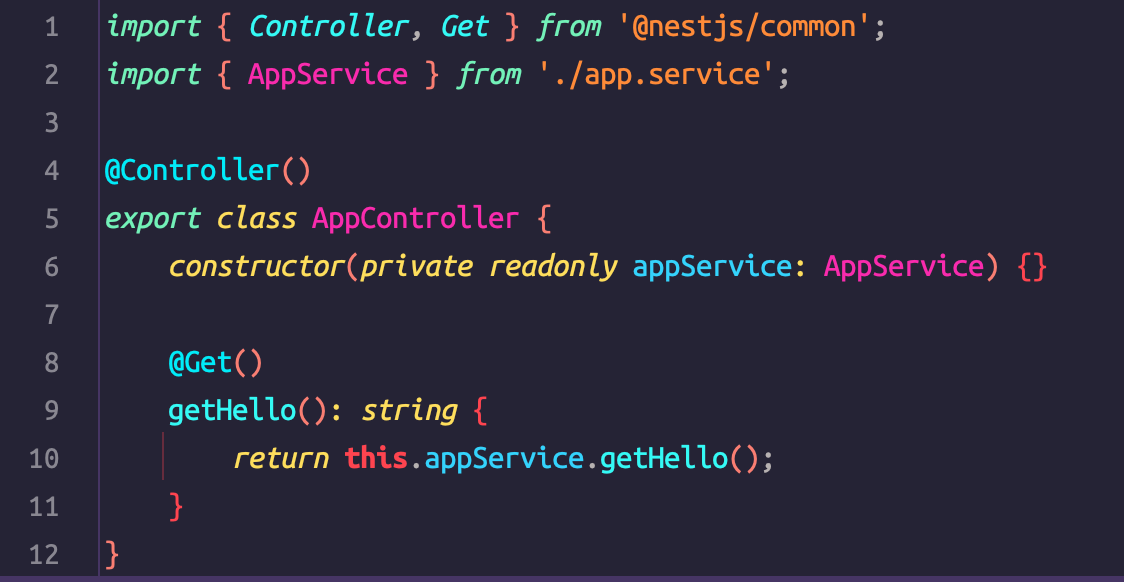
Example
Before:
After:
CoScreen
CoScreen is a software application that allows teams to collaborate in real-time by sharing their screens and working together on a shared virtual desktop. If you're new to CoScreen, here's a step-by-step guide on how to install it on your computer:
Step 1: Go to the CoScreen website
Visit the CoScreen website at https://www.coscreen.co and click on the "Download" button.
Step 2: Download the installer
Choose the appropriate installer for your operating system (Windows or Mac) and click on the "Download" button.
Step 3: Install CoScreen
After the installer is downloaded, open it and follow the prompts to install CoScreen on your computer.
Step 4: Sign up or log in
After installation is complete, open CoScreen and either sign up for a new account or log in with your existing CoScreen credentials.
Step 5: Invite team members
Once you have signed in, you can invite your team members to join your workspace. To do this, click on the "Invite" button in the top right corner of the screen and enter their email addresses.
Step 6: Start collaborating
Once your team members have joined your workspace, you can start collaborating in real-time. You can share your screen or individual application windows, and your team members can interact with them as if they were on their own computers.
In summary, to install CoScreen for collaboration, you need to download and install the appropriate installer for your operating system, sign up or log in, invite team members, and start collaborating by sharing your screen or individual application windows. CoScreen is a powerful collaboration tool that can help teams work more efficiently and effectively, regardless of their location.