Nest (NestJS) is a framework for building efficient, scalable Node.js server-side applications. It uses progressive JavaScript, is built with and fully supports TypeScript (yet still enables developers to code in pure JavaScript) and combines elements of OOP (Object Oriented Programming), FP (Functional Programming), and FRP (Functional Reactive Programming).
So, first things first: What is a REST API?
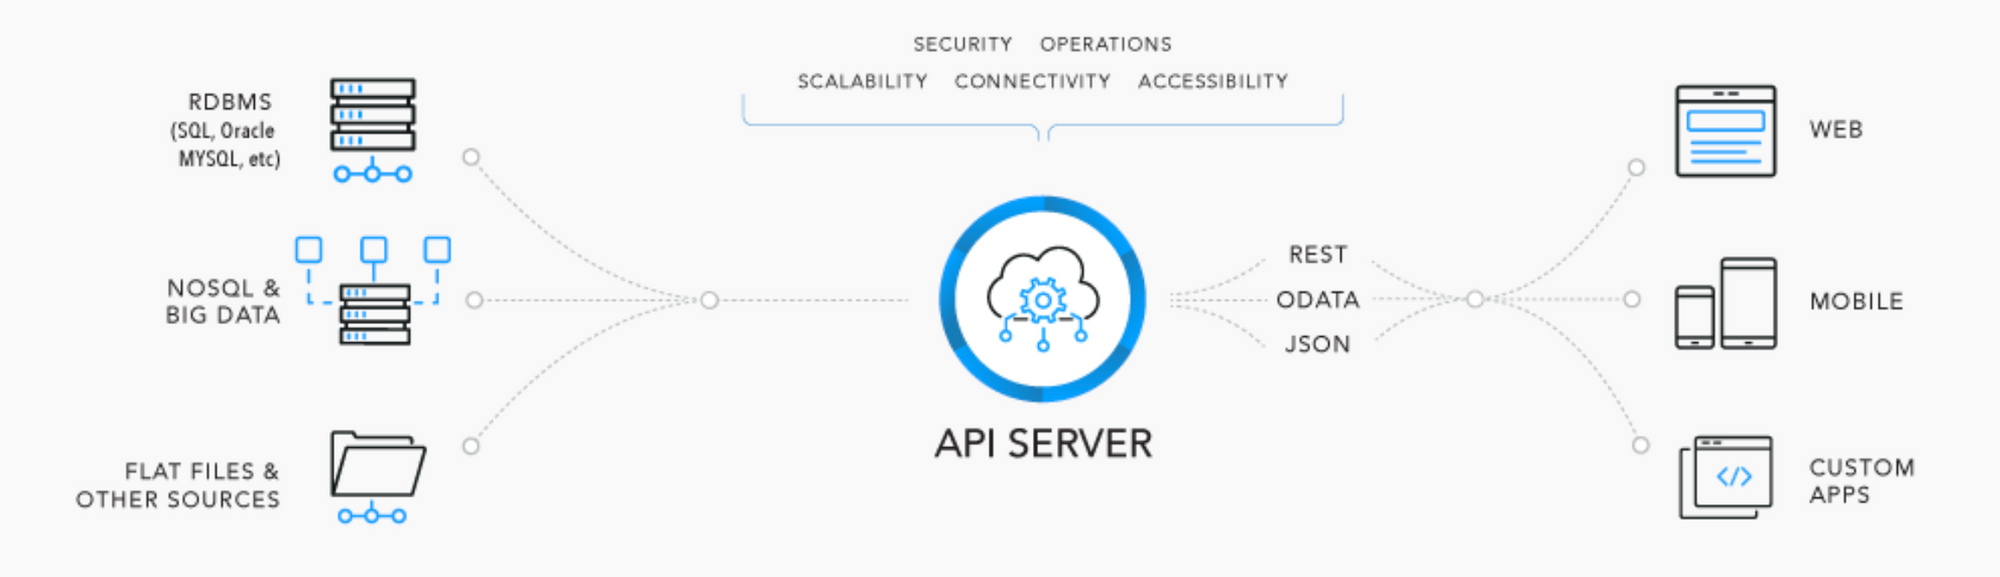
REST stands for "Representational State Transfer," and it's a way to build web services that allow different systems to communicate with each other over the internet. Basically, a REST API is a set of rules that govern how different software applications can talk to each other using the HTTP protocol.
To give you a concrete example, let's say you wanted to build a simple web application that lets users create and view to-do lists. You might build a REST API that allows the front-end of your web app to communicate with a back-end server that stores and retrieves the to-do lists.
With a REST API, you would define a set of endpoints (also called routes or URLs) that correspond to different actions that the API can perform. For example, you might have an endpoint for creating a new to-do item, an endpoint for retrieving a list of all the to-do items, and so on.
So, how can you build a REST API using Nest.js?
Nest.js is a popular Node.js framework for building scalable and maintainable server-side applications. It provides a set of tools and abstractions that make it easy to build robust APIs, including built-in support for the HTTP protocol, middleware, and more.
To get started, you'll need to install Node.js and Nest.js on your local machine. Then, you can use the Nest.js CLI (Command Line Interface) to generate a new project and scaffold out some basic API endpoints.
Here's an example of how you might create a simple "Hello, World!" API endpoint using Nest.js:
- Open a terminal window and navigate to the directory where you want to create your project.
- Run the command
npm install -g @nestjs/clito install the Nest.js CLI globally on your machine. - Run the command
nest new my-api-projectto create a new Nest.js project called "my-api-project". - Change into the new project directory by running
cd my-api-project. - Run the command
nest generate controller helloto generate a new controller called "hello". - Open the newly generated
hello.controller.tsfile and add the following code: import { Controller, Get } from '@nestjs/common'; @Controller('hello')export class HelloController { @Get() getHello(): string { return 'Hello, World!'; } }- Save the file, and then start the development server by running
npm run start:dev. - Open your web browser and navigate to
http://localhost:3000/hello. You should see the text "Hello, World!" displayed on the screen.
Setup
Install the nest.js cli globally:
npm i -g @nestjs/cliCreate a new project:
nest new project-nameOpen in IntelliJ:
idea project-name
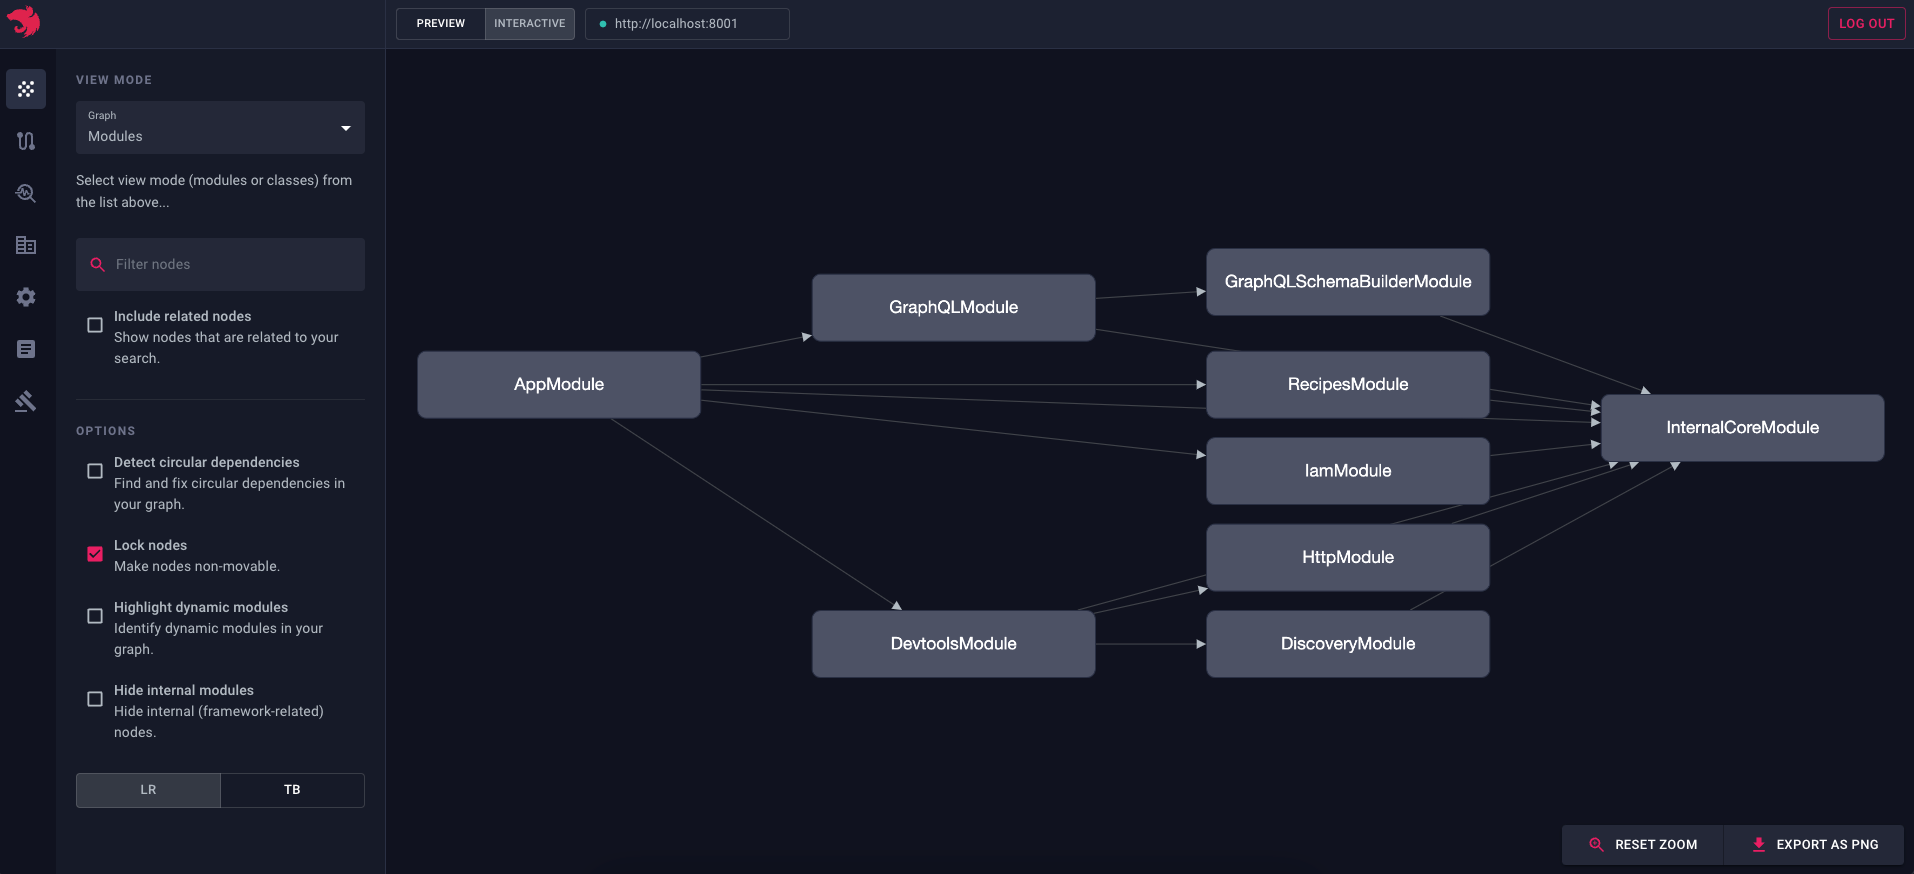
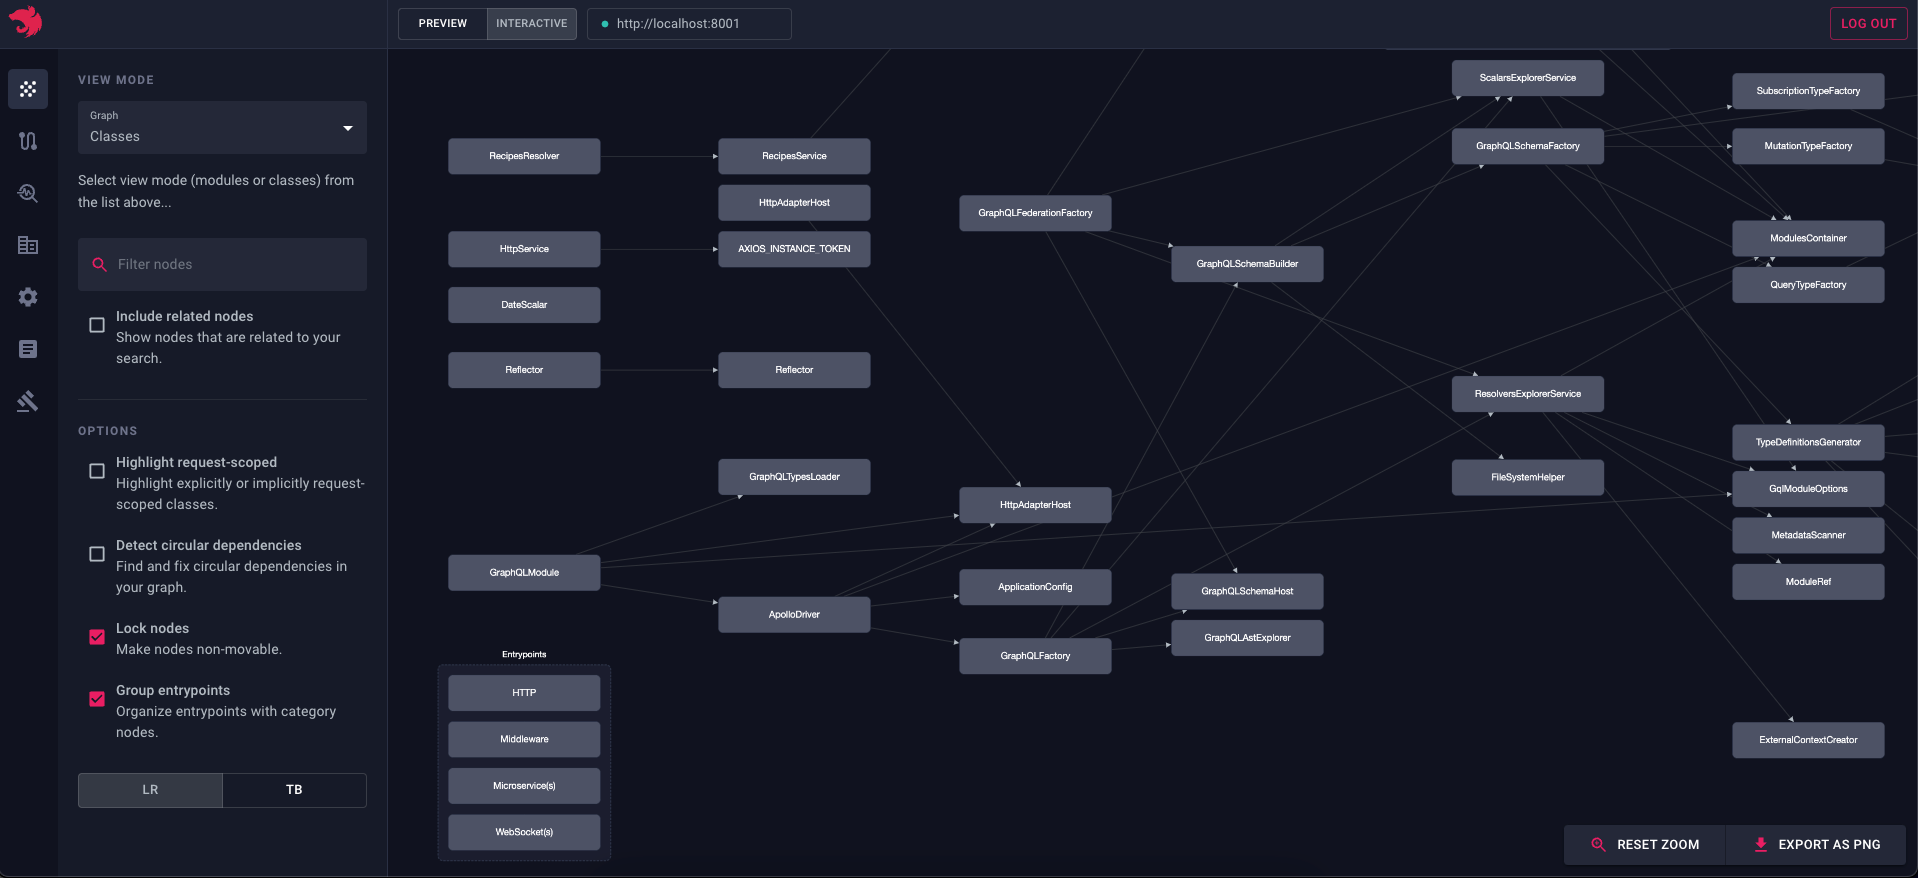
DevTools
npm i @nestjs/devtools-integrationTo start debugging your local application, open up the main.ts file and make sure to set the snapshot attribute to true in the application options object, as follows:
async function bootstrap() {
  const app = await NestFactory.create(AppModule, {
    snapshot: true,
  });
  await app.listen(3000);
}Register the DevtoolsModule in your AppModule by adding the following lines to the imports array:
DevtoolsModule.register({
	http: process.env.NODE_ENV !== 'production',
})
Your app.module.ts should look similar to this now:
@Module({
  imports: [
    DevtoolsModule.register({
      http: process.env.NODE_ENV !== 'production',
    }),
  ],
  controllers: [AppController],
  providers: [AppService],
})
export class AppModule {}https://docs.nestjs.com/devtools/overview
Running
npm run start:dev